Monday, December 30, 2019

Must have tools for an Electronics and Instrumentation Engineer


Hardwares

(1) Digital Multimeter: A 3-1/2  DMM is sufficient for most of the electrical and electronic measurements.

(2) Wires: 0.5, 0.75, 1 sq.mm wires spool are must. One can also use jumper wires.

(3) Screw-driver set

(4) Discrete electrical components (Inductors, Resistors, Capacitors)

(5) Power supplies (variable AC, DC)

(6) Wire cutter

(7) Wire stripper

(8) Insulation tapes

(7) ICs-

  • Operational amplifiers (LM741, OP07, LF356)
  • Timer IC (NE555)
  • Comparator (LM311)
  • Instrumentation amplifier (INA101, AD623)
  • Monoshot (74LS121/74LS123)
  • Digital IC -(AND, OR, NOR, NAND, NOT)

Softwares

(1) Proteus- For PCB designing
https://www.labcenter.com/downloads/

(2) LabVIEW - For data acquisition, processing, User interface design, machine vision,control-system design
https://www.ni.com/en-in/support/downloads/software-products/download.labview.html#329059

(4) Matlab- For mathematical analysis,image processing,control system design
https://www.mathworks.com/campaigns/products/trials.html

NB: Images copied from Google Images

Friday, December 27, 2019

Measuring temperature using Thermistor

  • Thermistor is a semiconductor based (metallic compounds including oxides such as manganese, copper, cobalt and nickel as well as single-crystal semiconductors silicon silicon and germanium) temperature sensor.
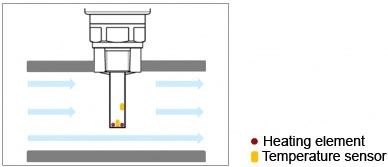
  • They are commonly packaged in a thermally conductive glass bead or disk with two metal leads.
  • It is a NTC (negative temperature coefficient) device i.e. its resistance decreases with rise in temperature. Although PTC Thermistors are also available, it is the NTC type which has gained wide attention.
  • When the doping is very heavy, the semiconductor achieves metallic properties and shows a positive temperature coefficient over a limited temperature range.
  • Thermistor is highly non-linear and one of the most sensitive temperature sensor. The high sensitivity of thermistor allows it to detect very small change in temperature which otherwise would not be possible with Themocouple and RTD.

Listed below are the features of Thermistor one need to consider:
(1) Very high sensitivity: It yields higher resolution in temperature measurement
(2) High sensitivity allows use of small mas and thus fast response and low measurement error
(3) Non-linear response
(4) Small geometry allows them to be easily integrate with electronic circuitry

The Resistance-temperature relationship of a Thermistor is governed by the equation

Rt = Ro{exp[B(1/T - 1/To)]}

Rt = Thermistor Resistance at T Kelvin
Ro = Thermistor resistance at To Kelvin
B= Temperature coefficient, ~3000-4000K
The above curve shows characteristics of a Thermistor with resistance 10k at 25 degC.
 
Relative sensitivity of Thermistor is:
 
B can be calculated from the NTC thermistor resistance at two reference temperature T1 and T2

Because of its high sensitivity and large resistance, it is not required to use 4-wire method (Kelvin's Bridge configuration) for Thermistor resistance measurement. A lead wire of 20 Ohm resistance would only cause less than 0.05 deg C error in measurement at 25 deg C which is insignificant for most practical purposes.

Lets do some math to validate above statement.

1/T - 1/To = (1/B)log(Rt/Ro)

dT/dRt = (T*T)/(B*Rt)

dT = 298*298*20/(3500*10000) = 0.05deg C
 
There is also a 3-parameter model of Thermistor given by the following equation known as Steinhart and Hart equation:
 

Linearizing Thermistor response

One disadvantage of using Thermistor is its non-linear behaviour. Its response can be linearized by adding a fixed shunt resistor but linearity comes at the cost of reduced sensitivity. 

The value of the fixed resistor can be calculated from the following equation.
where RT1 is the thermistor resistance at T1, the lowest temperature in the measurement range, RT3 is the thermistor resistance at T3, the highest temperature in the range, and RT2 is the thermistor resistance at T2, the midpoint, T2 = (T1 + T3)/2.
 
Interfacing with Data acquisition system:
 
As most data acquisition systems accept voltage input, it is recommended to convert change in voltage to corresponding change in voltage. A voltage divider network consisting of Thermistor and precision resistor is generally used.The accuracy of reference voltage also affects the accuracy of measurement.
Usually the value of R is taken to be equal to Thermistor resistance @25 degC. To avoid loading, the output voltage is fed to a voltage buffer.

Questions
GATE-2007
GATE-2008
GATE-2009
GATE-2014
A thermistor has a resistance of 1 kΩ at temperature 298 Kand 465 Ω at temperature 316 K. The temperature sensitivity in /K[i.e. (1/R)(dR/dT), where R is the resistance at the temperature T(in K)], of this thermistor at 316 K is ___________.


Friday, September 20, 2019

Understanding the working of Calorimetric flowmeter or Thermal Mass flowmeter


Calorimetric flow meters, as the name implies rely on calorie (heat) measurement. It is also known as thermal mass flow meter. It consists of two temperature sensors (mostly thermistors) and a heating element. One of the sensing element is constantly heated using heating element at constant power. This sensing element measures the temperature of heating element. The other sensing element measures the temperature of the medium in the pipe. The temperature difference is recorded and processed.

When the liquid flows through the pipe, it takes along the heat from tip of the probe, thus reducing tip temperature. Higher the flow velocity, more is the cooling and less is the temperature difference between two sensors.

The sensor heating can be done in two modes-

  1. Continuous heating mode: In this mode the heater is continuously ON because of which one thermistor is always hot and other is cold. The temperature difference which reduces with rise of flow is monitored.
  2. Pulsed or regulated heating mode: In this mode the the heating power is regulated so as to keep the temperature difference between sensors constant. With more flow, heating power required is more. By measuring the power, flow is calculated.

Schematic illustration of a measuring probe for a calorimetric flow switch

The mathematical equation governing the constant power type flowmeter is as below:
where v is the velocity of the medium, K is the calibration constant, p is the density of fluid, Ts is the sensor tip temperature, To is the medium temperature, Q is the heat supplied to heater.

Both temperature detectors (heated and reference sensor) can be connected in a bridge circuit as shown in figure above. At very low flow velocities, the bridge is imbalanced. At very low flow velocities, the bridge is imbalanced and the output signal is high. When the flow rate increases, the heated detector cools down and its temperature comes closer to that of a reference detector, lowering the output voltage.

These type of flowmeters have following characteristics:
(1) Accuracy : +/- 5%,
(2) Can measure both flow and temperature of the medium
(3) Maintenance free
(4) Easy to install. Can be mounted in any position. The sensing probe shall be completely immersed in the medium.
(5) Correction factor is required when used for liquids other than water. This is due to different thermal conductivity (k) values.

Friday, July 19, 2019

Current measurement with Hall effect sensor

Large AC/DC current measurement using Hall effect sensor

Some applications require us to measure and display large current like motors, amplifiers, transmission lines or current collectors without actually disturbing the actual setup. In this post I will describe how to make large current measurement using non-contact method.

We will use hall effect based current sensor for this purpose.

Hall Effect
When a current-carrying conductor is placed into a magnetic field, a voltage will be generated perpendicular to both the current and the field. This principle is known as the Hall effect.

The Hall voltage is proportional to the amount of current and magnetic field strength.
Vh = Kh* BI/t
Kh is Hall coefficient, B is magnetic field strength, I is the current through the conductor, t is the thickness across which voltage is generated.
The current carrying wire passes through the aperture of the sensor. A hall element is fitted inside the core  of these sensors. The magnetic flux around the wire interferes with the Hall element and generates a voltage signal. The scheme of measurement is as shown:
The Hall voltage is a low-level signal on the order of 30 microvolts per unit gauss magnetic field. This low-level output is prone to noise and requires an amplifier to amplify it to suitable level..


Signal details of CSLA2CD sensor
CSLA2CD Hall effect current sensor


The main advantage of this sensor is its form factor which makes it easier to put on a PCB. Other advantage being current measurement range- which is upto hundreds of ampere.


Thus by reading analog signal at AI pin, we can measure current through a target.


Saturday, July 6, 2019

Optoisolator cum voltage level converter circuit using 4N35


All digital devices work at a voltage level of 5V/3.3V but many field devices work at a much higher voltage level (12V, +/-15V, 24V).

For example 8051 microcontroller input works in 0-5VDC signal and a sensor may work at 24VDC. Interfacing the sensor with the microcontroller will irreversibly damage the microcontroller. In such situation we are required to change the signal level of sensor from 24 VDC to 5 VDC to make the interfacing possible.
Also it is very important to isolate the signal from field devices as they may carry high voltage spike picked up from machines like motor.

An optoisolator can offer both solution at a time. It can provide isolation voltage of the order of few kV and convert the signal level. Here we are talking only about digital isolation.

I mostly use 4N35 IC for isolating digital IOs. It offers isolation of 1.5kV between input and output.
I will share the schematic and selection of suitable values of components.

The circuit in Fig-1 perform an invert operation. When sensor o/p is present, photodiode will be ON and emit light towards phototransistor. This will turn the phototransistor ON. Resultant output to load will be short to ground.

We have 24VDC output from sensor which has been converted to 5VDC by using 5  volt supply. It can be changed to whatever level just by replacing the output side supply.

Also note that the Ground label is different. We shall not short the ground of sensor supply and output side supply for better isolation.

Fig-1
In fig-2, the output follows input albeit at different signal level. When input signal from sensor is present, the circuit outputs 5V (actually 3.5V considering 1.5V drop across collector-emitter CE) and when input signal is absent, output is connected to ground via 10k resistor.
Fig-2
Input resistor R1 is selected after looking into the datasheet of 4N35 as well sensor.
The maximum forward current I(f) for 4N35 is 50mA. For 24VDC and 1k resistance at its input side, it will draw 24/1k- 24mA current which is less than maximum rating.

We must also check if sensor output is capable of providing this much current.

For very low value of I(f), voltage drop across CE will be large.

Modbus and OPC comparison Table

  Modbus vs OPC Comparison between Modbus and OPC Feature Modbus OPC (OLE f...