Saturday, October 19, 2024

Multi Channel Analog data display on Python based GUI from Arduino Serial port


To create a Python Tkinter GUI that fetches many comma-separated values from a serial port and displays them we can use the pyserial library to handle the serial communication. Below is a simple example demonstrating how to achieve this. Make sure you have both tkinter and pyserial installed. You can install pyserial using pip if you haven't done so already:


The arduino code is simple modified version of available AnalogReadSerial example. In the code 4 AI channels are read and one DI channel is read. Their values are transmitted over Serial port. Note the COM port number of device and change accordingly in the code.


// the setup routine runs once when you press reset: void setup() {  // initialize serial communication at 9600 bits per second:  Serial.begin(9600); } // the loop routine runs over and over again forever: void loop() {  // read the input on analog pin 0:  int Val1 = analogRead(A0);  int Val2 = analogRead(A1);  int Val3 = analogRead(A2);  int Val4 = analogRead(A3);  bool state = digitalRead(8);  // print out the value you read:  Serial.print(Val1);  Serial.print(Val2);  Serial.print(Val3);  Serial.print(Val4);  Serial.println(state);  delay(500);        // delay in between reads for stability }


Below is the Python script.

      
import tkinter as tk
import serial

# Serial port configuration
SERIAL_PORT = 'COM3'  # Change this to your serial port
BAUD_RATE = 9600

class SerialApp:
    def __init__(self, master):
        self.master = master
        self.master.title("Serial Data Display")
        
        # Create labels for each value
        self.labels = ['Val1:', 'Val2:', 'Val3:', 'Val4:']
        self.value_labels = []

        # Configure font
        label_font = ("Helvetica", 30, "bold")
        
        # Create and place labels in grid
        for i, label in enumerate(self.labels):
            lbl = tk.Label(master, text=label, font=label_font)
            lbl.grid(row=i, column=0, padx=20, pady=10)
            value_lbl = tk.Label(master, text="", font=("Helvetica", 30))
            value_lbl.grid(row=i, column=1, padx=20, pady=10)
            self.value_labels.append(value_lbl)

        # Open serial port
        self.serial_port = serial.Serial(SERIAL_PORT, BAUD_RATE, timeout=1)

        # Update the GUI
        self.update()

    def update(self):
        try:
            # Read data from serial port
            line = self.serial_port.readline().decode('utf-8').strip()
            values = line.split(',')

            # Ensure we have four values
            if len(values) == 4:
                for value_lbl, value in zip(self.value_labels, values):
                    value_lbl.config(text=value)

        except Exception as e:
            print(f"Error: {e}")

        # Schedule the next update
        self.master.after(1000, self.update)

    def on_closing(self):
        self.serial_port.close()
        self.master.destroy()

if __name__ == "__main__":
    root = tk.Tk()
    app = SerialApp(root)

    # Handle window close event
    root.protocol("WM_DELETE_WINDOW", app.on_closing)

    root.mainloop()


The GUI will look as below


https://github.com/arihant122/Python-Tkinter-based-GUI-by-fetching-Serial-port-data-from-Arduino-

Monday, September 23, 2024

Getting Started with Codesys v3.5 and Wago PFC200 (750-8212)


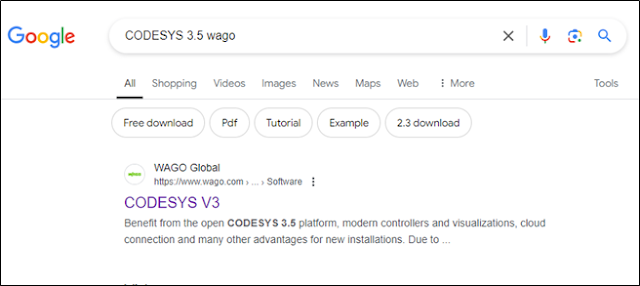
Step 1: Search for Codesys v3.5 in any search engine.


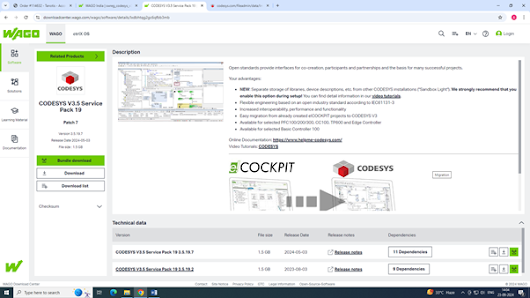
Step 2: When you click on the link, it redirects you to following page. Click on the download button. It will redirect you to a new webpage with Codesys v 3.5 descriptions.


Step 3: Click on Open Page link, which open a new webpage.


Step 4: User can download the software along with dependencies as a bundle download or selecting individual dependency as per his/her requirement.


Step 5: Click on Codesys 3.5 setup file to initiate installation.


Once installation is complete, launch the Codesys to check if installation is correct.

After this, you have to install Wago Licensing, Wago Solution Builder, Wago codesys Download Server, Wago Device and Libraries which are downloaded in Step 4 as a bundle.

Step 6: Again Launch Codesys 3. Create a New Project from Basic Operations.


Create a standard project and then choose suitable Name and Location where you want to save the project file.


Once done, you have to select the Device and Programming Language from drop down menu.


I have selected 750-8212 as my PLC device and Ladder Logic Diagram as my programming language. You will see the device list only if Wago Device and Libraries are properly installed.


Selected target system is different from the connected device

Once you connect a Wago PFC 750-8212 device with PC and develop a ladder program, you will have to download the program into the PLC.

In some cases, it may display “selected target system is different from the connected device” error message. This happens due to firmware incompatibility between the codesys wago device library and PLC firmware. The user will have to update the firmware of the device in that case.


PLC Firmware update


In the softwares downloaded in Step-1, you will find Firmware also which needs to be uploaded to the PLC. The firmware can be uploaded using Wagoupload. WAGOupload is a stand-alone PC software for transferring, backing up and restoring PLC applications on WAGO 750 Series controllers.


RF PCB Design-Part 3: Transmission Line Design

Transmission line design is fundamental in RF PCB design for maintaining signal integrity and minimizing power loss at high frequencies. A t...